
I'm about to build a small studio so surfing the web and watching various lighting technique videos is my recent educational hobby. Being on a slightly restrained budget is a good thing otherwise I'd spend money worth a small/medium/super car on various appliances that I probably never need.
I'm a big fan of Kino Flo and the way Peter Hurley is using it for his superb headshots - but spending something around EUR 1.000 - 2.000 for lights isn't an option yet. So stumbling across an instructional DIY video by the Winnipeg based photographer Tristan Shea Penner on how to make the rig using appliances from the nearest hardware store. You can have a look on his video and diagrams here.
I've followed the instructions with a bit of improvising. The results can be seen below:

I went to the nearest hardware store and got:
- 3 sheets of 9mm strong plywood based on the measurements provided on the diagram 38x143 cm.
- Obviously wiring, marrettes, waterproof casing, screws, bolts, etc and additionally I've got a light switch. The power wire is 5 meters long not to mess about with extension cables.
On the image above you could see the layout before the fun started.

I've decided to paint all the plywood black but was way too lazy to sand it. Above you can see an already assembled rig with four neon tubes, wired up to the switch and working fine!!!
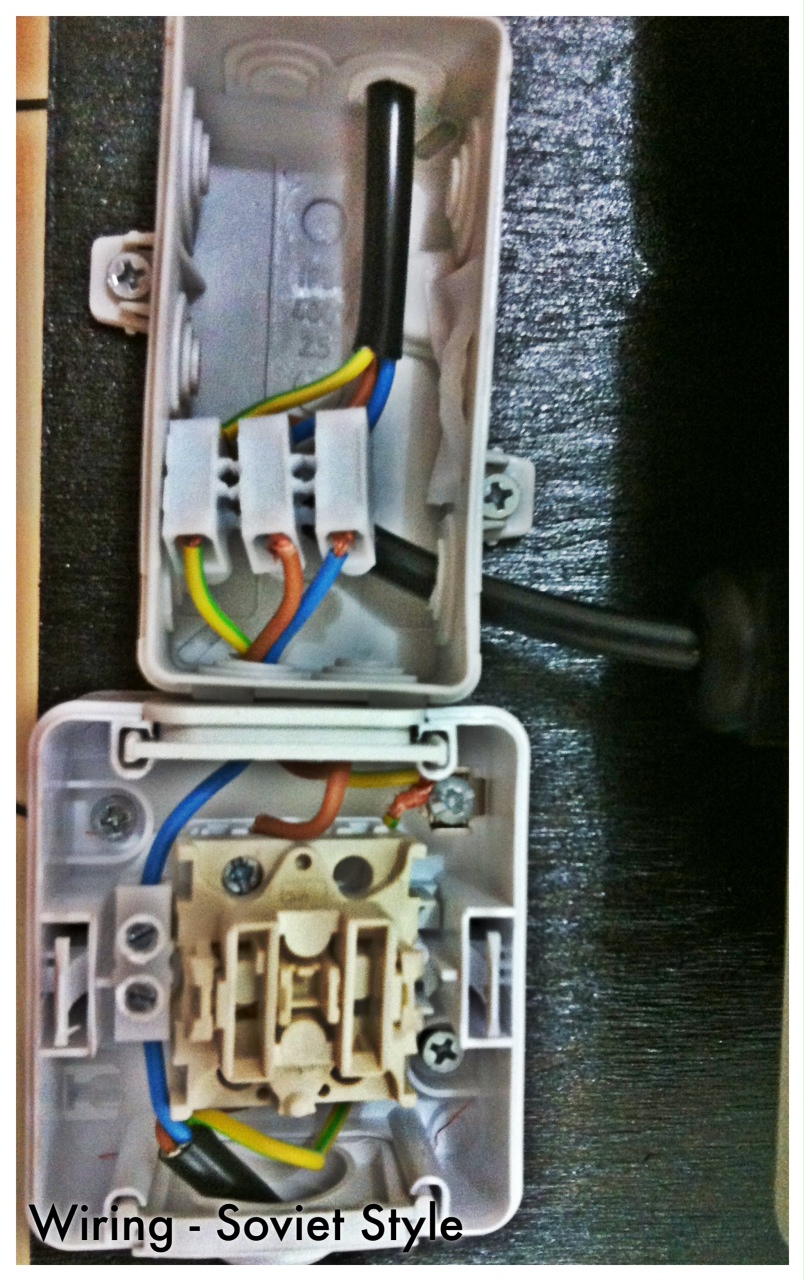
A bit of wiring, I'm not a big friend of diagrams, because I basically have no clue how to make them. The biggest issue that I've got a one pole switch; you can see the blue wire had to be put in a Soviet Style workaround :)

That's the working setup. First rig was completed about 3 am in the morning, with several small troubles with wiring on the way. The total budget of this project is roughly EUR 150. The only downside of course is the heavy weight (roughly 8 kg) and some minor flickering of the tubes before they warm up.
I'll post some pictures of the ready setup once I move in into my new studio. I'd advise to use heavy duty lighting stands especially for the top light I'd use something like the EUROLITE SHOW STAND I ALU .
.
Thanks for the reading. More images to follow.
